Showing posts with label projects. Show all posts

Wednesday, February 8, 2012

Love Is...


It's almost Valentine's Day and there are so many crafty ideas out there on the web.
  I came up with one of my own and wanted to share it with you.

  Valentine's Day is mostly linked with romantic love, but I wanted to focus on the most perfect love there is...
God's love.


  So I grabbed my bible and found scriptures, some that spoke of God's love for us and some that spoke of how we are to demonstrate that love to others.  There are so many to choose from, but I narrowed it down to 29;
 one for each day of February.


So once I had the scriptures, I set out to gather the rest of my supplies.  I still have the branches I used for my Jesse Tree.  They've been bare since after Christmas and they were begging for a bit of decoration.  I went to Michael's and grabbed some 3-D felt heart stickers, a 12x12 sheet of red polka-dot scrapbook paper and embroidery thread.

I stuck all of the stickers onto the blank side of the scrapbook paper and cut them out so the red polka dot paper can be seen on the back of each of the felt hearts.  Then I used a sewing needle to string the embroidery thread through each heart and tied a knot so they could be hung onto the tree.  But, before hanging each heart I wrote down the address to a love scripture on the polka dotted side of the hearts.


So each night after dinner we each take turns grabbing a heart and the red bible nearby, looking up the scripture and reading it to the family.  Then we talk about it.  It's been a blessing to share with each other about what God's love is and how we're meant to show it to others.
  
We're discovering the true meaning of love.

And I'd like to share it with you...

Here are the scriptures that decorate the hearts on our tree.
 We are reading one together each night in February and
letting the word go deep into our own hearts.


May God's love be sown deep into your heart and made evident to all!


This post shared at...


Tip Junkie handmade projects


Home Stories A2Z

Sunday, January 15, 2012

Home Goals

The Nester

So I mentioned in My Word for 2012 post that I wanted freedom, and one of those areas I need freedom in is my home.  For one thing we just seem to have too much clutter.  I mean, where does all the stuff come from?  But, I have one main room in my home that needs some renovating so we can put it to use.  So when the Nester decided to host a Home Goals party, I decided to share my area of need and put my goal out there...a good way to hold myself accountable I think.

We live in a 100 year-old house that has a 3rd floor with 2 rooms. We've used them for various purposes over the 13+ years we've lived here, but over the last several years, as we filled the other rooms with 3 boys and their stuff, the 3rd floor became a sort of storage area.  Our dream is to make those rooms into an office/craft room and a sort of "quiet retreat" prayer space. 

So here is how the rooms look now...


Scary!  The ceiling is awaiting insulation and dry wall.  We've collected a nice bunch of cabinetry that's been sitting in boxes on my front porch {for an embarrassing amount of time} which my husband will install.  Floors need to be redone, walls painted, new lighting, decor, etc.
  Lots to do.   Not to mention all the "stuff" that's now sitting in the front room that needs to be sorted through.  Uhh!  But once it's complete I can see myself spending so much time up there.  Having an office to manage my husband's business and to aid in the management of our home will help so much in clearing clutter and paperwork from other areas of our home.   Also, having a place to create will be so amazing.  Once upon a time that space was my craft room and I long to have a place to create in again.  And having a little retreat space where I can sit and relax and have some quiet time in the morning to pray will be such a little luxury.  I look forward to it.

Here are some makeover inspiration photos that I found on Pinterest...

Better Homes and Gardens  via loving this life on pinterest
Better Homes and Gardens via loving this life on pinterest
Decor Pad via loving this life on pinterest
  
I'm hoping to start making some progress and to post pictures as we go through this diy project. 

Do you have any home goals this year? Share them over at the Nesting Place or just check out the goals of some of the 300 others who've shared.

Saturday, October 29, 2011

31 Days {Day 29} Create a Mudroom Using What You Have

I know, you're probably thinking, 
What does creating a mudroom have to do with seeking peace?  

Well, if you've got kids and stuff then you know corralling their mess would definitely bring a little peace to the house.  So, take a look at these mudrooms I found on the web...great inspiration. 


source: mudroomfurniture.co

source: BHG.com

source: pottery barn

Beautiful, huh?
  And completely unrealistic...at least for me.  So, aside from moving into a brand new, big house, I decided to use what I already have in my nearly 100-year-old, small house to create my own mudroom.  And, when I get an idea, I want it done like yesterday, so I wasn't going for built-in cabinets or anything fussy, just function that still looked nice.  I used one of my go-to decorating techniques...I shopped the house.  Oh, I'd love to head over to HomeGoods and spend some serious money, but when money's tight, even for HomeGoods prices, I get creative. 

So, I set out to "shop the house" in order to create my "mini-mudroom" on the cheap (that is, for free)!
First, in my small house I needed to find the space. I don't have a "bonus" room or even a defined entryway into my home.  So, I decided upon a tiny, 3ft wide wall in my kitchen next to the fridge.

Then, I got to "shopping".

  I found a piece of wood in the garage. Had my hubby hang it and add some hooks he had lying around...a place to hang coats and backpacks...check.  I also repurposed some plastic file wall containers to hold homework in progress and other papers...3 mailboxes...check. 
  

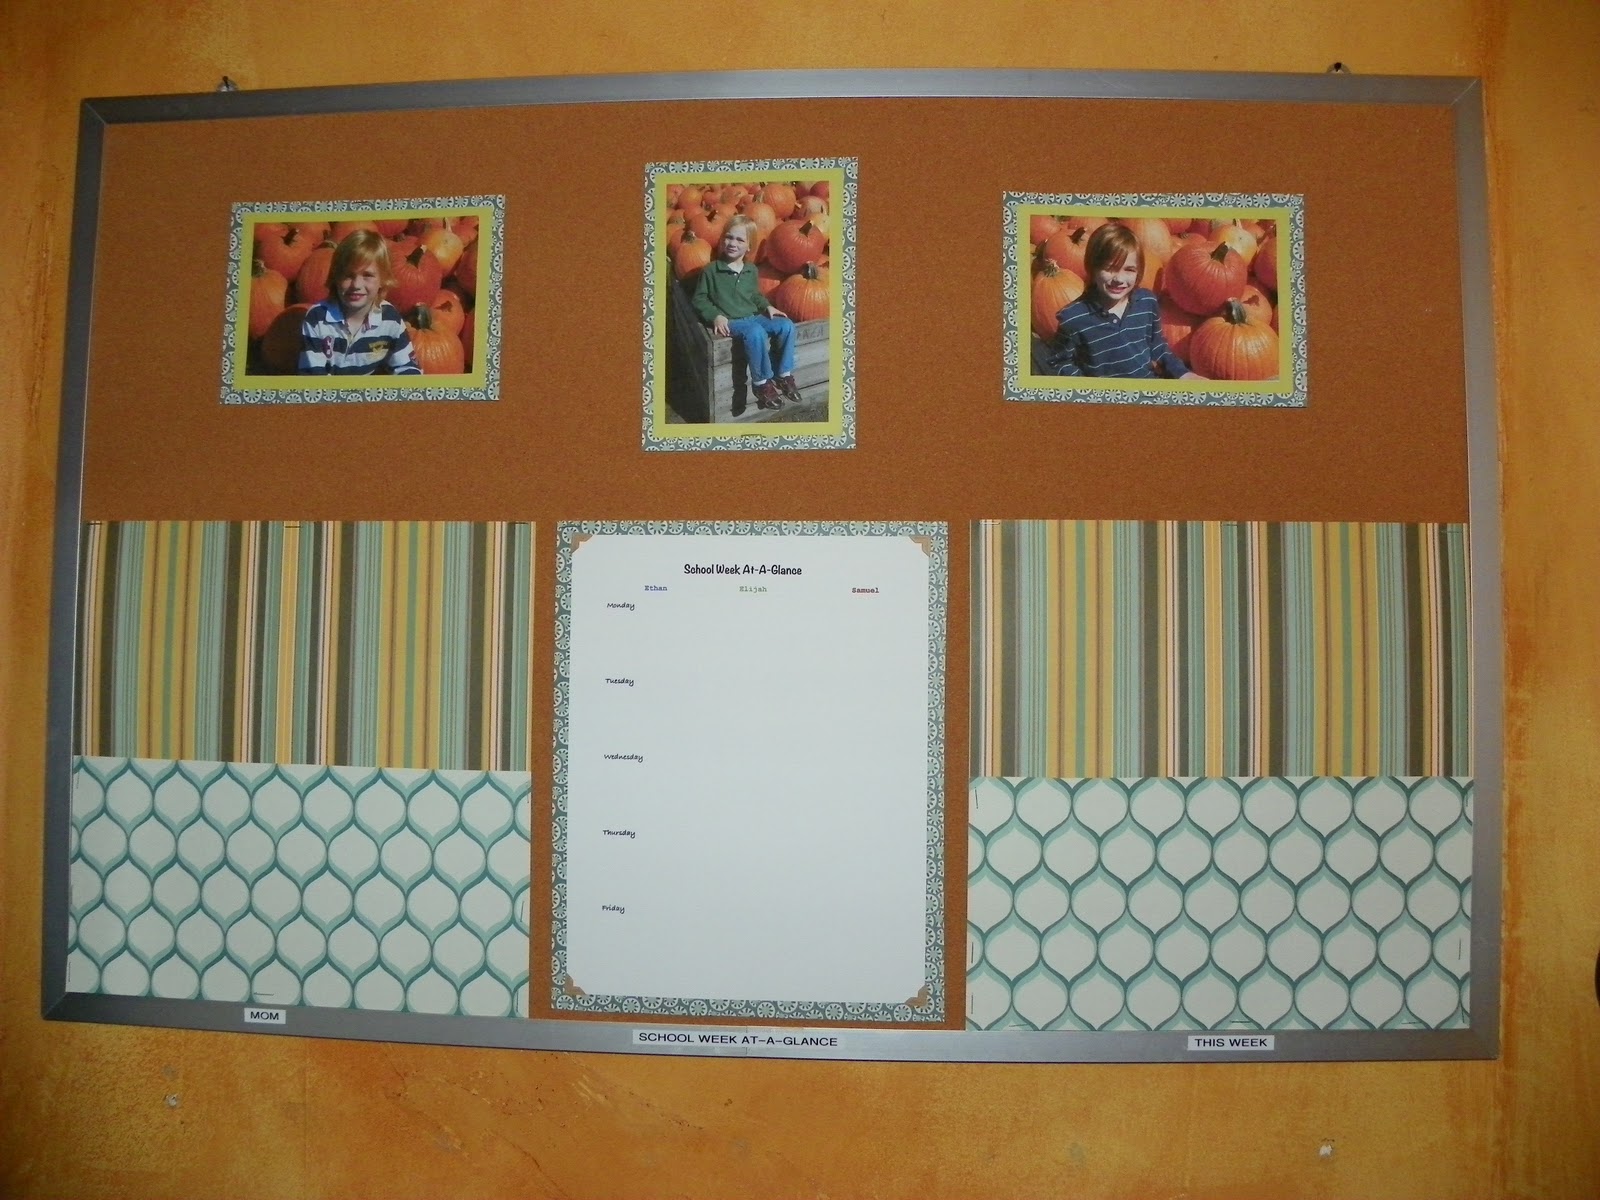
And...to jazz up the plain old wood, I covered it with scrapbook paper left over from my cork board re-do I did in the summer.  (You can check that out here.) 
To cover the wood I just cut the paper into strips, coated the plain wood with Mod Podge, randomly placed the paper strips and covered them with more MP...
30 minutes later...done!


  The boys had a cork board that wasn't really being utilized in their bedroom, so I added that to my mudroom...a place for important papers...check.


Again, I used the scrapbook paper to add a few details like pockets to hold papers that need to be turned in this week, such as field trip slips or picture forms.  I made a pocket mailbox for me too.  I also came up with a "school week at-a-glance" page.  This is where I can record everyone's "specials" for each day, sports events, and extra things that the boys may need to bring to school.  Having this in one place and out in the open helps me to keep track of what's going on in their world for the week, instead of scrambling at the last minute.

Finally, I grabbed 3 fabric bins I had purchased a couple years ago for toy storage.  I had since "downsized" the toys so the bins weren't being used...a place to corral shoes...check.

And this is what I came up with...it's not Pottery Barn, but it was "free" and it's very functional.


And it brings some peace to the house...mission accomplished!

So what about you?
Do you need a place for your kids' stuff?
  Take a walk around your home with a creative eye.
  Where can you create your own mini-mudroom? 
Only have enough room to do it in a closet?
  Check out this closet-turned-mudroom from Ohdeedoh


Have you missed a day in reading 31 Days of Seeking Peace in the Midst of the Mess ?  

If you aren't following Loving This Life yet, I’d love to invite you to do so. Simply click here or go to the side bar and click on join this site.  There are also options on the side bar to subscribe to receive posts in a reader or to sign up for email to have each post delivered to you right into your inbox.  

There are over 700 bloggers taking the challenge, along with me, to write about one topic for 31 days.


Saturday, July 23, 2011

cork board redo

Here's a project that I did way back at the beginning of the summer. A little redo on the usual cork board info center.  Here's what it looks like....


I wanted a one stop spot for calendars, our "summer list", and other activity info, and I wanted it to be pretty to look at.

Here's how I did it...
I already had a large cork board hanging in my kitchen which was filled with the boys art work and school papers.  I liked having a place to display their papers, but it wasn't working for this space anymore.  So I dismantled the board, grabbed some leftover paint from the dining room walls (Benjamin Moore's "Waterfall") and covered up the cork.  Much prettier already.


Then, I was inspired so I went to my supply stash and grabbed a few things I already had in order to complete the project.


I grabbed an array of coordinating patterned Amy Butler scrapbook paper, photo corners, twine, scissors, hole punch and stapler.  I printed out 3 months worth of calendars, added our "Summer Fun List" which we created as a family by listing a bunch of fun activities that we'd like to try out this summer, a few other things and got to work putting it all together. 


That pocket at the bottom I made by stapling 2 pieces of paper together and it holds info about the state parks, library and other activities of interest around our area.  Finally I finished it off by crafting a quick pennant banner with the leftover paper and attached it to drape across the top...just a little bit of fun. 

This cork board has been so helpful in keeping us on track with our calendar and most of all with inspiring us with ideas of fun things to do.  The boys love to take turns checking off the summer list when we've done an activity.  It's not only been functional but also pretty to look at.

Here it is in our kitchen...


This post is linked up with...


Home Stories A2Z

  
and
Tip Junkie handmade projects
and


Related Posts Plugin for WordPress, Blogger...